
Contrast enhancement – part 2/2
Image ProcessingAll right, now that we added some missing bricks, like Y’CbCr to RGB , we can finish our contrast enhancement started in the post Contrast enhancement – part 1/2.
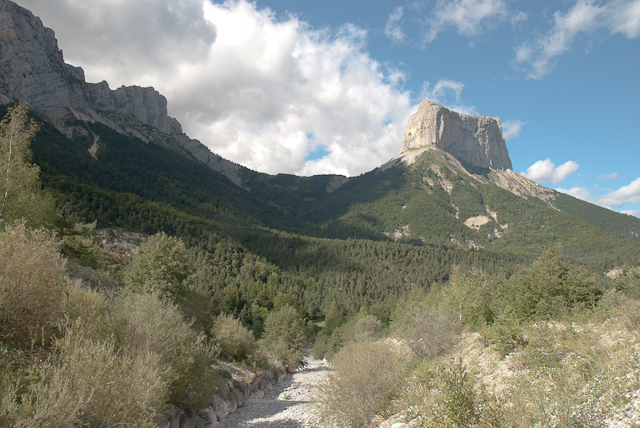
The goal is to tweak poor contrast images, like this one:
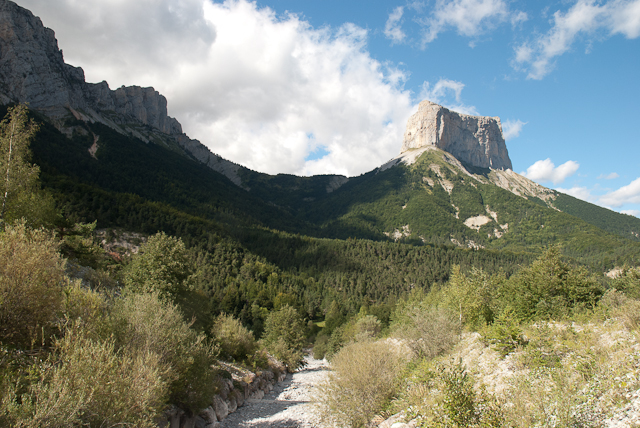
And to make these pictures automatically and reasonably contrasted:
So let’s summarize, the idea is :
- to convert a RGB picture into Y’CbCr.
- to compute an histogram from the luma channel
- This is covered in the post Contrast enhancement – part 1/2
- to get luma stretch points
- these points are values from the histogram, for both dark and bright sides
- they are computed so that the number of pixels being darker or brighter than these luma values is aligned with a threshold we defined, or tuned.
- example : we may want to get at least 1% of black and white pixels after contrast enhancement. We need to count the pixels in the histogram, starting from black (first bin of the histogram), until we get 1% if the total number of pixels in the picture.
- This is also covered in the post Contrast enhancement – part 1/2
- stretch the luma channel based on these points
- here our implementation will be quite simple. No fancy histogram analysis and equalization.
- we will simply remove the dark stretch point, and multiply by a gain so that pixels originally at bright stretch point become white.
- convert back to RGB, as detailed in this post.
So it looks like the only missing function is the one stretching the luma channel.
I did it like this :
      //Luma stretch
      if (ycbcr[0][loc] <= black_stretch_pt) {
        new_ycbcr[0][loc] = 0;
      }
      else if (ycbcr[0][loc] >= white_stretch_pt) {
        new_ycbcr[0][loc] = 255;
      }
      else {
        j = (float)(ycbcr[0][loc]-black_stretch_pt) / (float)(white_stretch_pt-black_stretch_pt) * 255;
        new_ycbcr[0][loc]=constrain(round(j),0,255);
I also tweaked a little bit the function displaying the histogram, and added a text showing the amount of black pixels in the stretched picture.
Note that contrast enhancement is automatic in a sense that if picture is already contrasted enough, nothing will change. This auto contrast is ensuring that we have the minimum % of black and white pixels in final picture. It may sound strange to request some black and white pixels, because it means we will loose some details. That true, however, a small amount of black and white pixels will cause negligible loss of details, and perceived contrast will be much better.
In this example, the % of black pixels will be set by you, dynamically, using a slider control like in previous example about color saturation. For the bright side, we will request 0%, it means no stretch will be applied on the brighter areas of the picture.
Now, we can play with the live example, in Processing.js, and of course check the source code. The set of ISP functions is getting a little bit better, so updated isp.pde is uploaded at the same location as before.
I hope you enjoyed reading and following this tutorial. I am now considering my next options :
- switching my functions to OOP, and creating an Image class with all the image processing methods.
- adding a GPL licence
- creating a GitHub repository
- and of course adding more processing methods : edge enhancement, noise reduction, color correction matrix, tone mapping, etc !
Your comments are welcome !
Note: the picture was taken by me. The mountain is called the “Mont Aiguille”, I used to live nearby. It is in France, Isère.